In short. In Administration then Employees, create the positions first: as long as that list is empty, the “Position” field of a record has nothing to offer. Then enter people one by one, or drop your Excel or CSV file without reformatting it: the application recognizes the columns, and nothing is saved until you confirm.
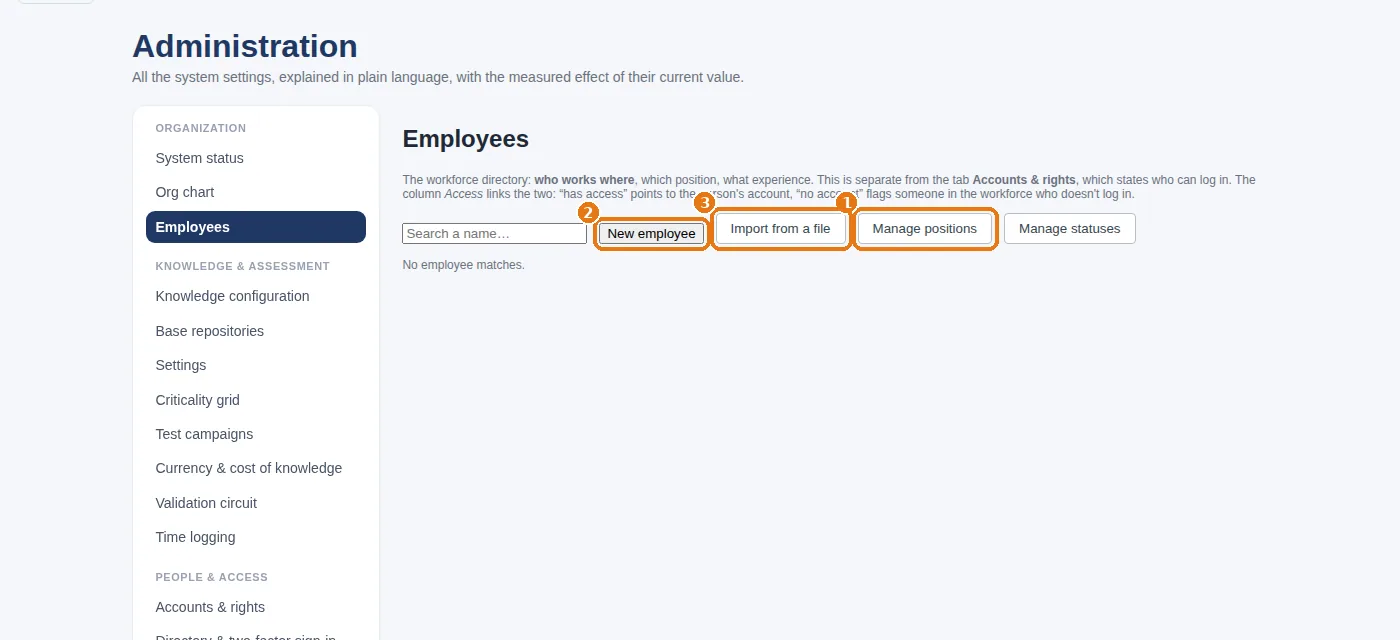
Administration › Employees. In a blank space, the page shows only its buttons: 1 Manage positions, 2 New employee, 3 Import from a file. Start with the first one.
1. Positions first
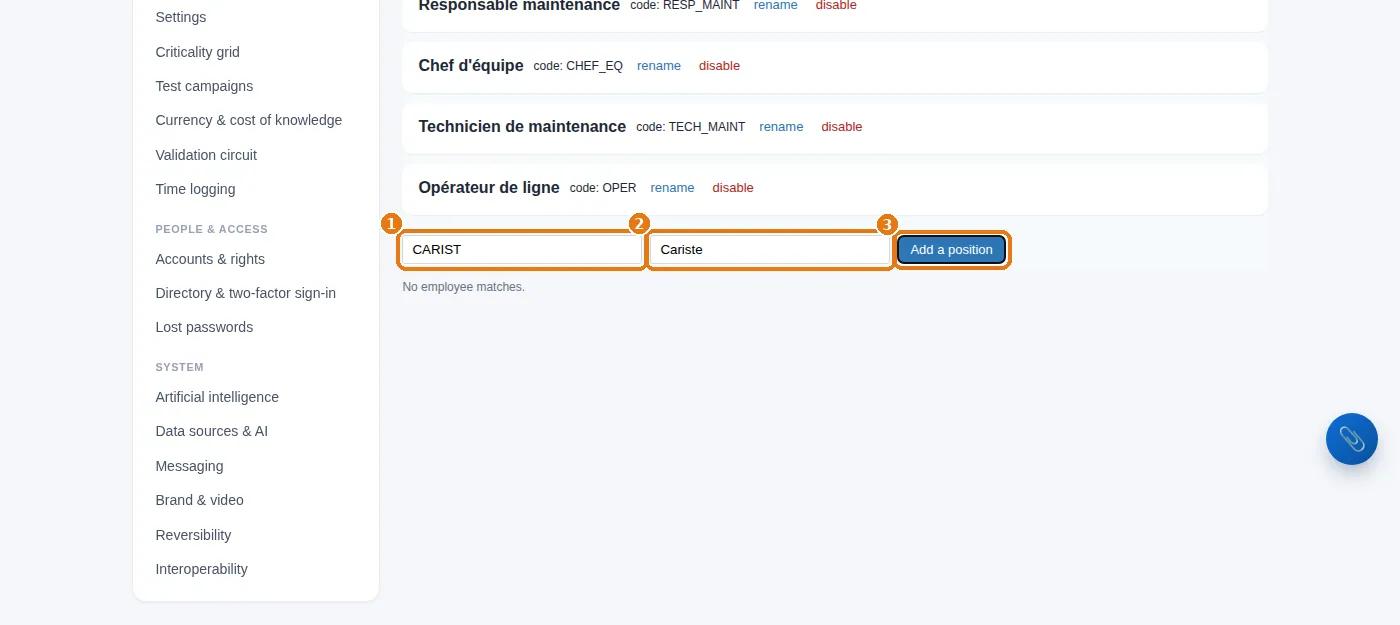
The “Position” field of a record is chosen from a list: as long as that list is empty, there is nothing to choose. Manage positions:
The neighbouring Manage statuses button opens the administrative statuses (worker, clerical employee, technician, supervisor, executive…), which are already provided. The status automatically sets how demanding the tests are.
2. A record, field by field
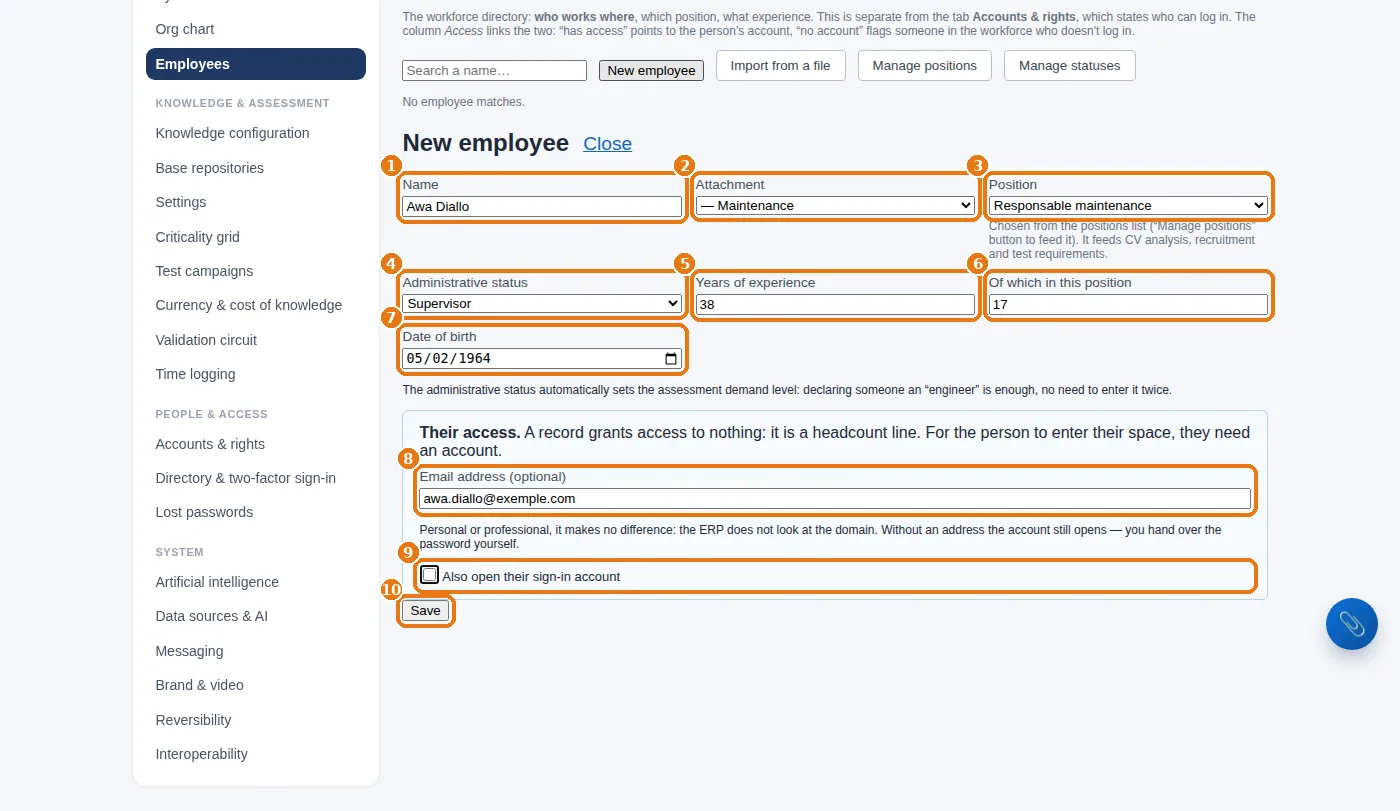
Click New employee. Here is each field and what it changes:
| Marker | Field | What to enter, and why |
|---|---|---|
| 1 | Name | First name and last name, as they should appear everywhere (reports, committees, academy). |
| 2 | Attachment | ONE structure: the most specific one that truly describes the person (the department, not the whole organization). The levels above it inherit from it. |
| 3 | Position | Chosen from the list of positions. It is used for CV analysis, recruitment and test calibration. |
| 4 | Administrative status | What the person is under their employment contract. It sets how demanding the assessments are. |
| 5 6 | Years of experience · Of which in this position | The starting point for experience; the “experienced” and “seasoned” thresholds are based on it. |
| 7 | Date of birth | Optional but valuable: this is what makes it possible to anticipate retirements. Without it, the map shows today's risk, not the risk five years from now. |
| 8 | Email address (optional) | For notifications and for sending out access details. The domain does not matter. |
| 9 | Also open their sign-in account | Leave it unticked for now: accounts will be opened in waves at step 7, once tasks have been assigned. |
| 10 | Save | The same button is used both to create and to edit. |
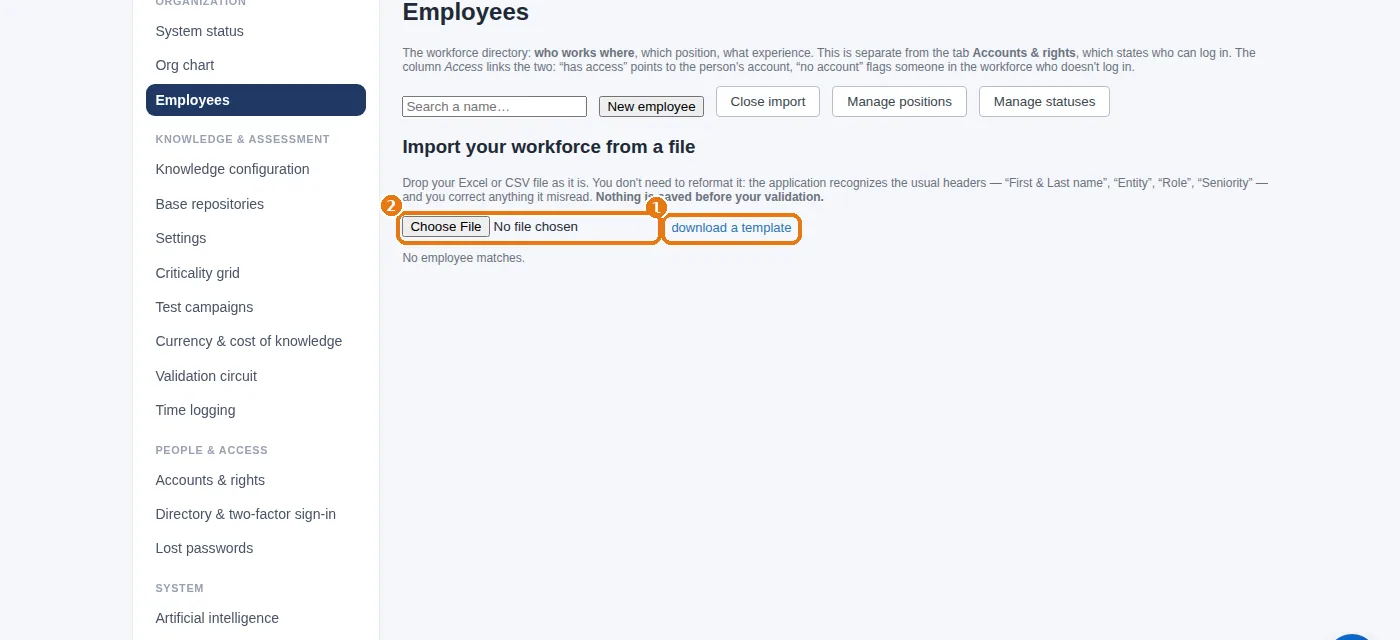
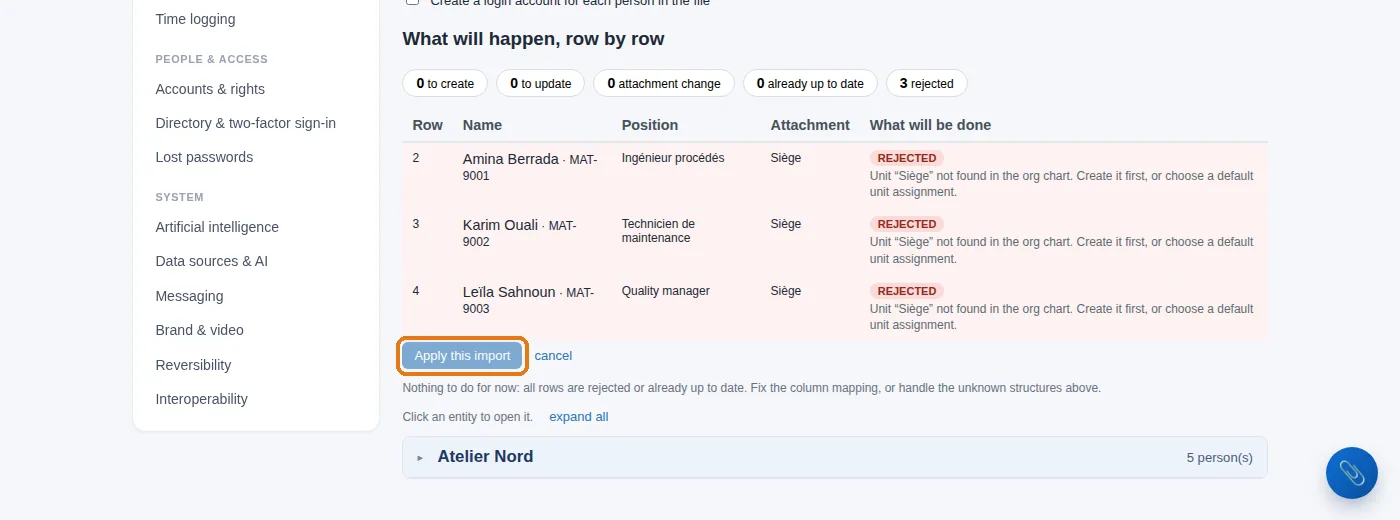
3. Twenty, a hundred, a thousand people: importing
4. What you should see
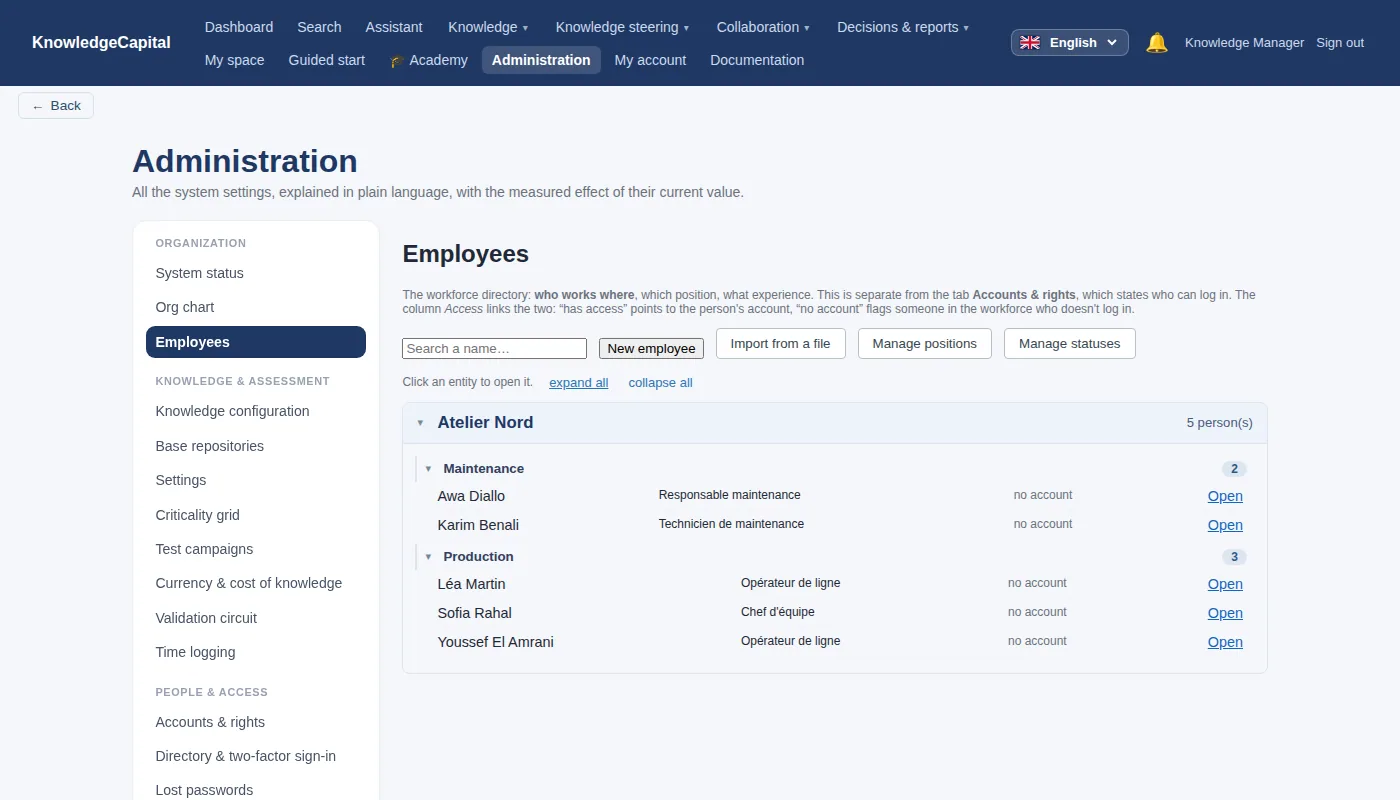
Each person appears under their structure. Click expand all to open all the departments at once.
5. Your own record, and your account
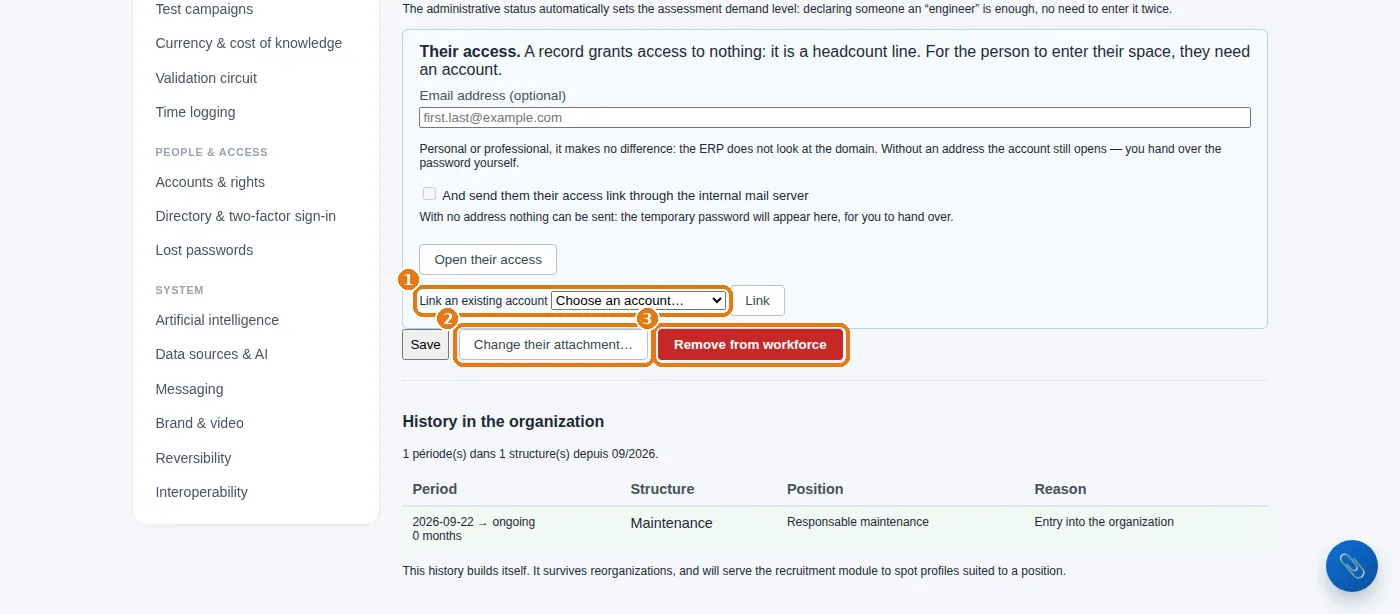
Are you part of the workforce? Create your record like everyone else's, then link your account to it: otherwise My space will tell you that your account is not linked to any record, and your own knowledge will not count anywhere. Click Open on your row:
See also: Step 1 — The org chart, starting from a single structure · Step 3 — The repository: skills, then knowledge items · Step 7 — Opening accounts, choosing roles, letting people in · Skills mapping: method and software · How to build a knowledge management system from scratch
Frequently asked questions
How do you import employees from an Excel file?
Administration then Employees, “Import from a file”: drop your Excel or CSV file exactly as it is. The application recognizes the columns, shows a line-by-line preview, and saves nothing until you click “Apply this import”.
Why is the position list empty in an employee record?
Because the positions have not been created yet. Open “Manage positions” and add them, with a short code and the label as it is used in your organisation.
Why enter an employee's date of birth?
It is optional, but it is what makes it possible to anticipate retirements. Without it, the map shows today's risk, not the risk five years from now.